How to change wifi channel on your router
If you live in a crowded place, you may have noticed times when your wifi suddenly slows down or goes nowhere. These performance issues are often caused by multiple people accessing the same WiFi channels in your area. To improve your WiFi signal, it is a good idea to find and use an unused WiFi channel. Here’s how to change the channel on your router to speed up your WiFi signal.
What is a WiFi Channel?
Most WiFi routers these days transmit data using 2.4 GHz and 5 GHz bands. Each of these bands is divided into channels used to send and receive data over your WiFi network.
You might think of the two highways as the 2.4 GHz and 5 GHz frequency bands, and the WiFi channels as the lanes on those highways. If you want to choose the fastest lanes on both highways, you should choose the ones with less traffic.
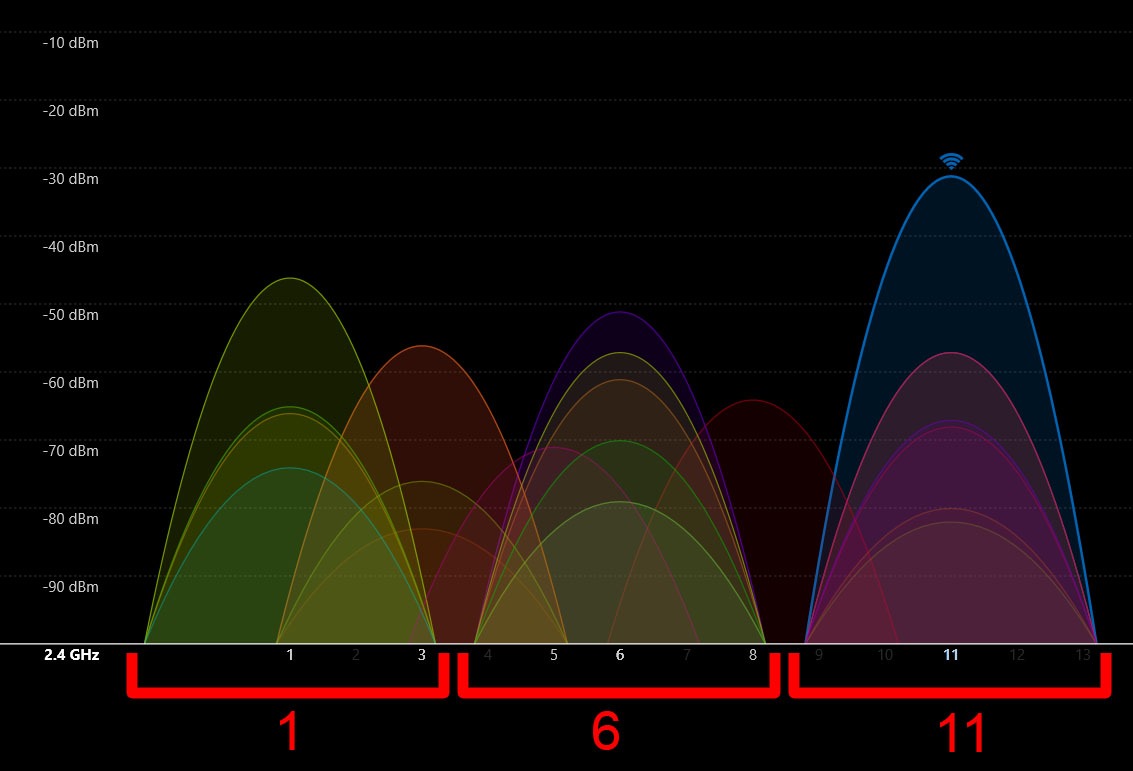
If you use a 2.4 GHz band, channels 1, 6 and 11 are usually the best choice because they do not overlap.
On the other hand, if you are using a 5 GHz band, you can choose up to 24 non-aligned channels.
Learn more about The difference between 2.4 GHz and 5 GHz, And what you should use, check out our article here.
Many routers use the same channel by default. So, if you do not change your WiFi channel, your router will use the same channels as your neighbors, which will slow down your WiFi signal. Here’s how to change your WiFi channel on the router.
How to change your wifi channel
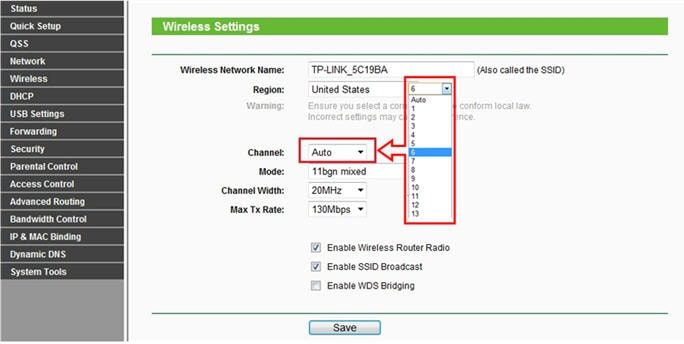
To change your WiFi channel, sign in to your router using any web browser. Then open and find the wireless settings Channels Drop menu. Select the channel and click Save.
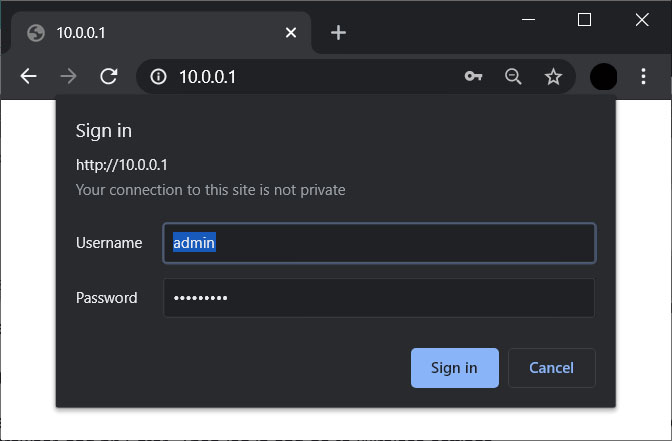
- Open a web browser and enter your router’s IP address in the address bar. If you do not know the IP address of your router, see our step-by-step guide How to find the IP address of your router on a Windows 10 PC or Mac.
- Then hit Enter On your keyboard. At this point your browser may display an alarm screen. To continue, click Improved > Proceed.
- Next, enter your username and password. If you do not have your login credentials, see our step-by-step guide How to find your router username and password Here.

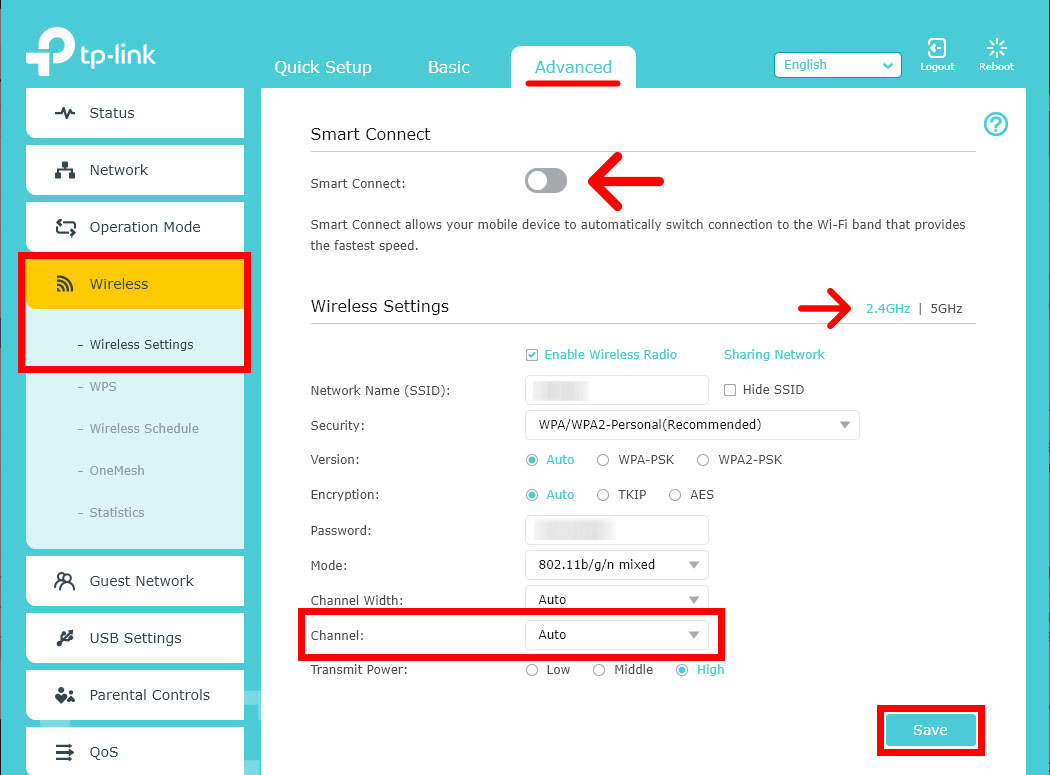
- Then open Wireless systems. The exact name and location of this option depends on your router. In most cases, you have to choose Improved Settings First.
- Next, click Channels Change the drop-down menu and your WiFi channel.
- Finally, be sure to hit Save Or Apply.
Once you know how to change your WiFi channel, you need to find out which WiFi channel is less crowded. Here’s how to use the NetSpot app to find the best WiFi channel:
How to find the best wifi channel
To find the best WiFi channel in your area, download the NetSpot app for Windows 10 or Mac. Then install the app and run it. Next, click details And select your bandwidth. Then you can see on which channels the crowd is higher.
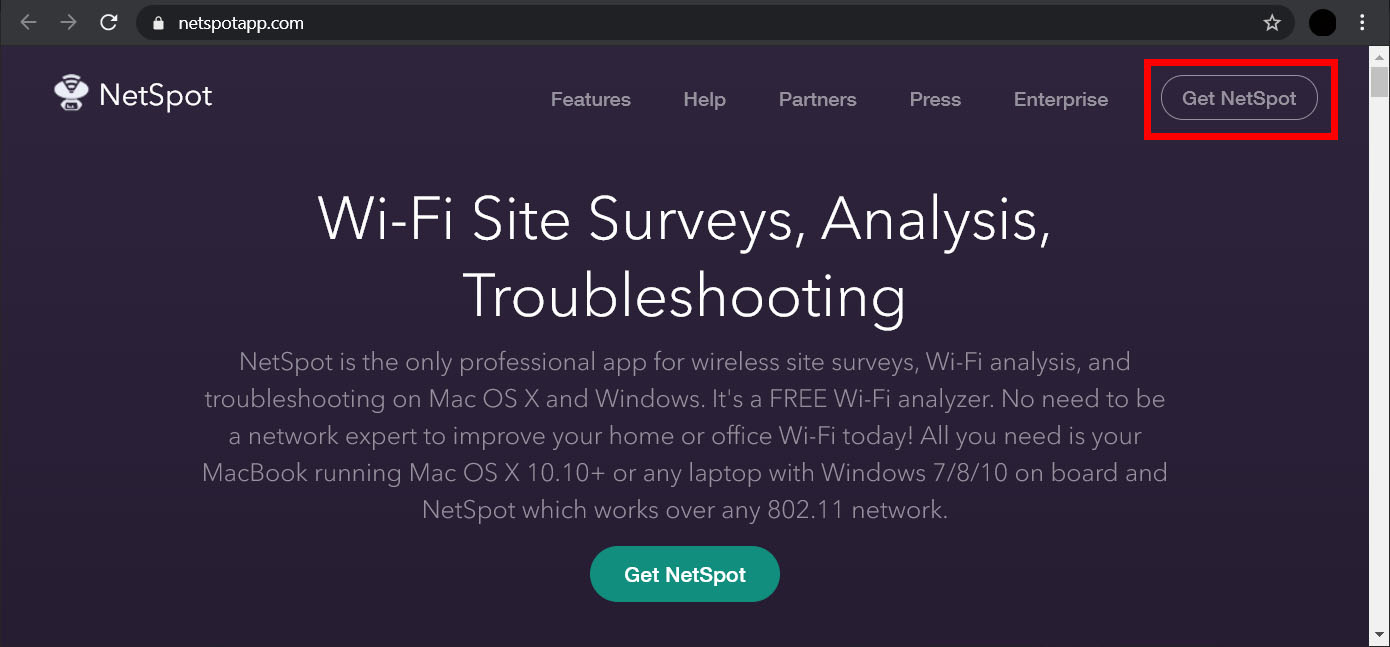
- Go to Netspot’s official website. You can see this netspotapp.com.
- And then click Get Netspot. You can see this in the upper right corner of the page.
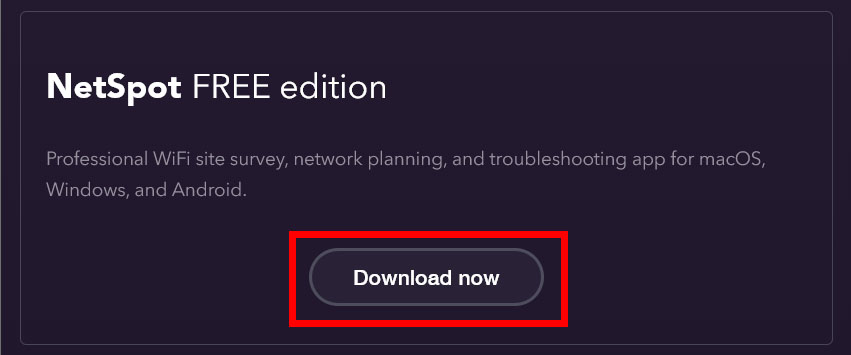
- Next, scroll down and click Download now. It will download the free version of the app.
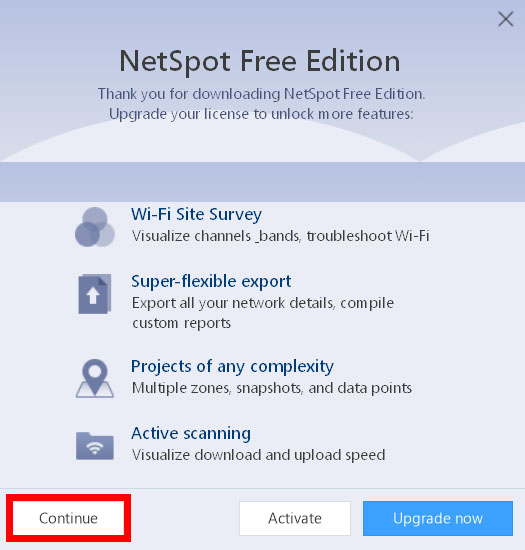
- Open the downloaded file to install NetSpot. If you can not find the downloaded app, check yours Downloads Folder.
- Next, launch NetSpot and click Proceed. This will allow you to use the free version of the app.
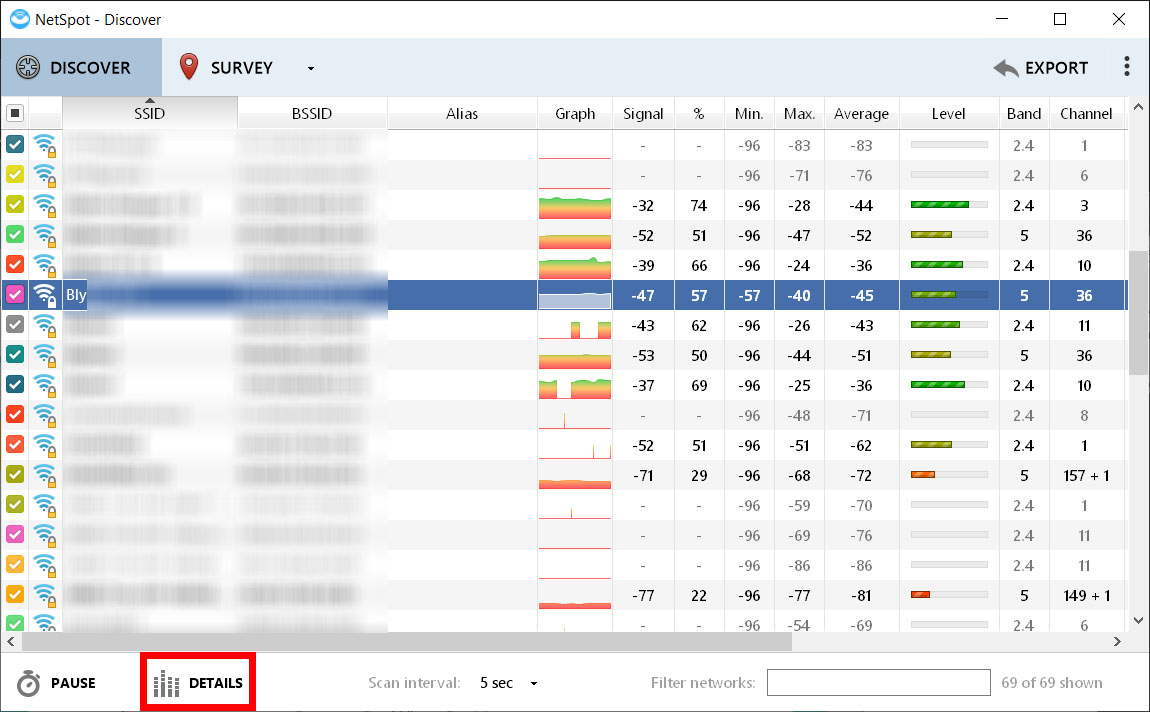
- Then select your WiFi network. You can see the WiFi networks in your area by name under the SSID (Service System Identifier) column. To make things easier, you can click on the SSID at the top of the column to sort by name. To select your network, click the name and check the box on the left. You can also see which channel your WiFi network is currently using Channel Column.
- Next, click details. You can see this in the lower left corner of the window. This will open a new window.
- Then select your bandwidth. In the upper right corner of the window you will find tabs for the 2.4 GHz and 5 GHz bands. If you selected your network in a previous window, you should now see that it is personalized.
- Better channels have less traffic. Each network in your area will be displayed as a separate bar. You can tell which channel each network is using by looking at the numbers in the center of each bar.
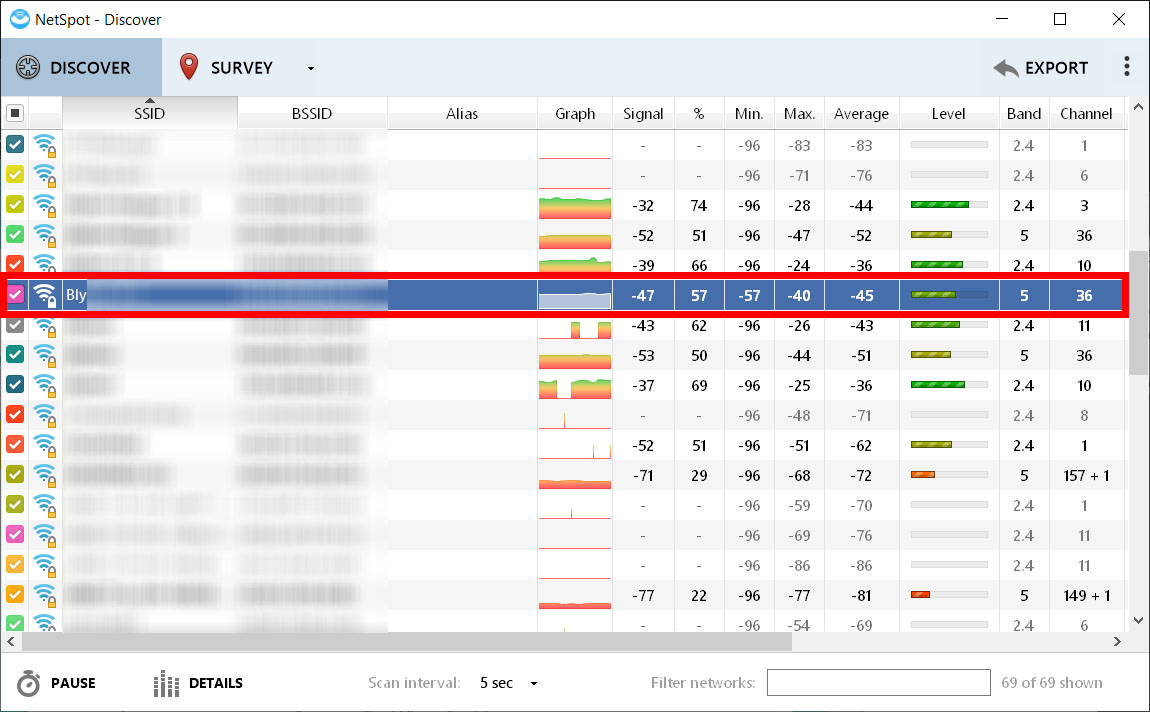
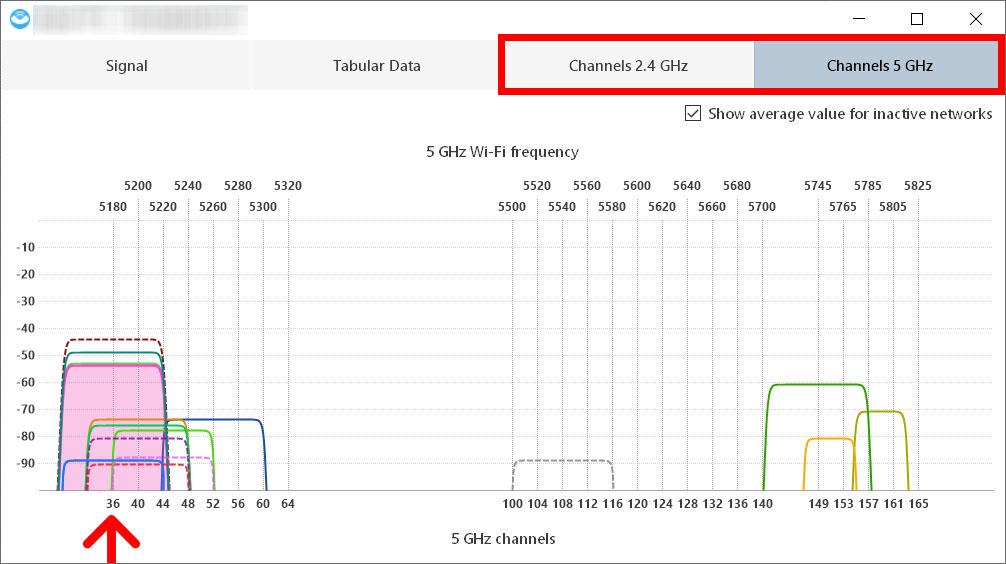
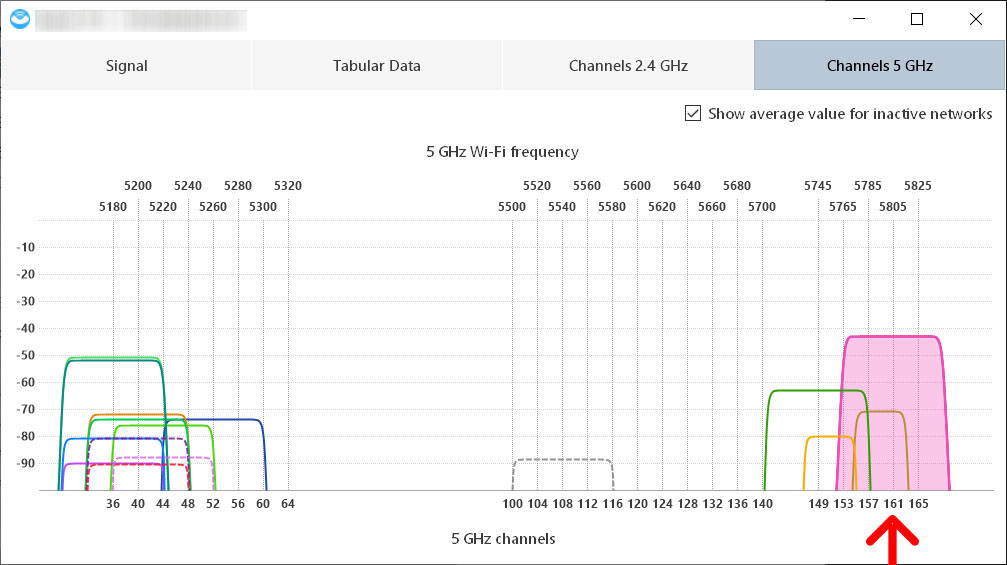
In the image above, the highlighted network uses Channel 36 in the 5 GHz band. That channel is overcrowded, so switching the channel to the other end of the group spectrum might be a good idea.
As you shift your network to a less congested WiFi channel, you should notice that your bar is higher, which means your network speed has increased.
If your WiFi signal is still weak, check out our guide How to boost your WiFi signal Here.
The Tech Chips editors choose the products and services we write about. When you make a purchase through our links, we may receive a commission.
Comments