How to set a static IP address for Windows 10 PC
There are several reasons to set a static IP address for your Windows 10 PC. In most cases, your router will assign a dynamic IP address to your computer, which will change from time to time. This makes it difficult to remotely access your computer, uses certain programs, and may allow other users on your network to send you files. Here’s how to set a static IP address on your Windows 10 computer.
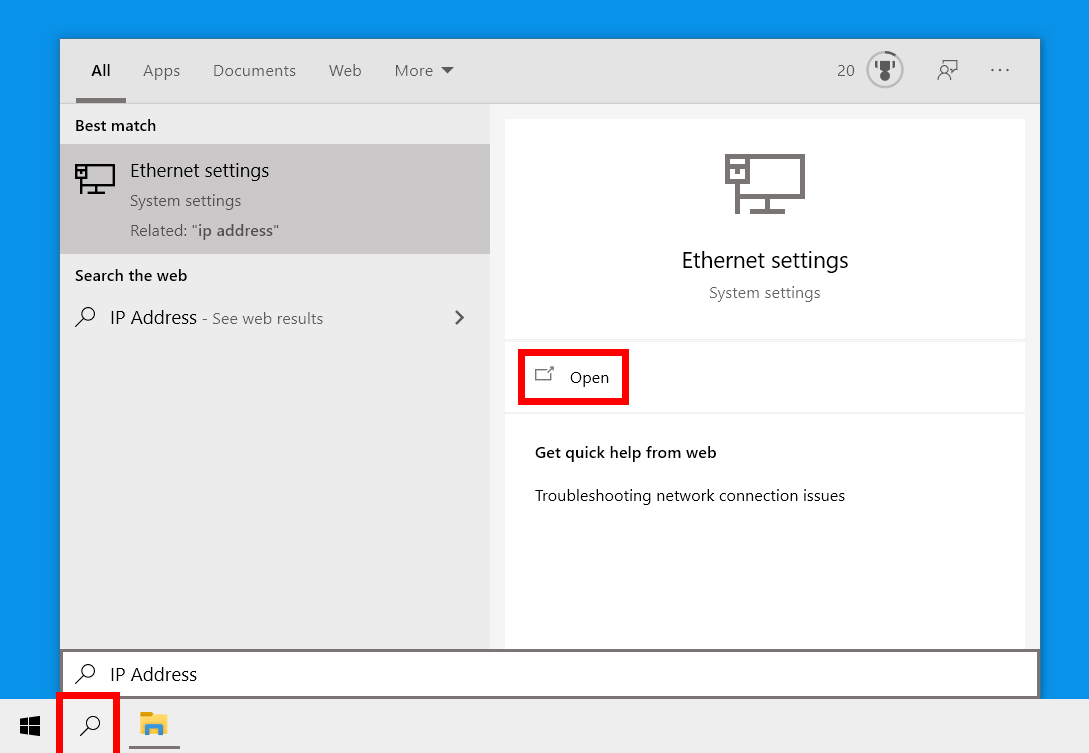
- Click the magnifying glass icon in the lower left corner of your screen.
- Then type IP address In the search bar and click Open. You can hit too Enter If you look at your keyboard Ethernet systems.

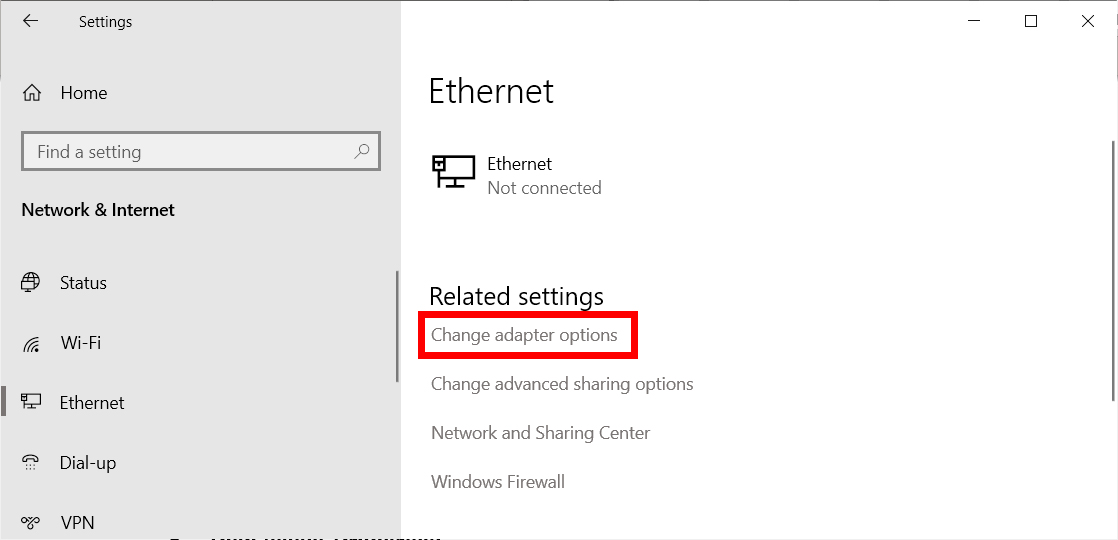
- And then click Change adapter options. You will find this below Related settings. This will open a Control Panel window.
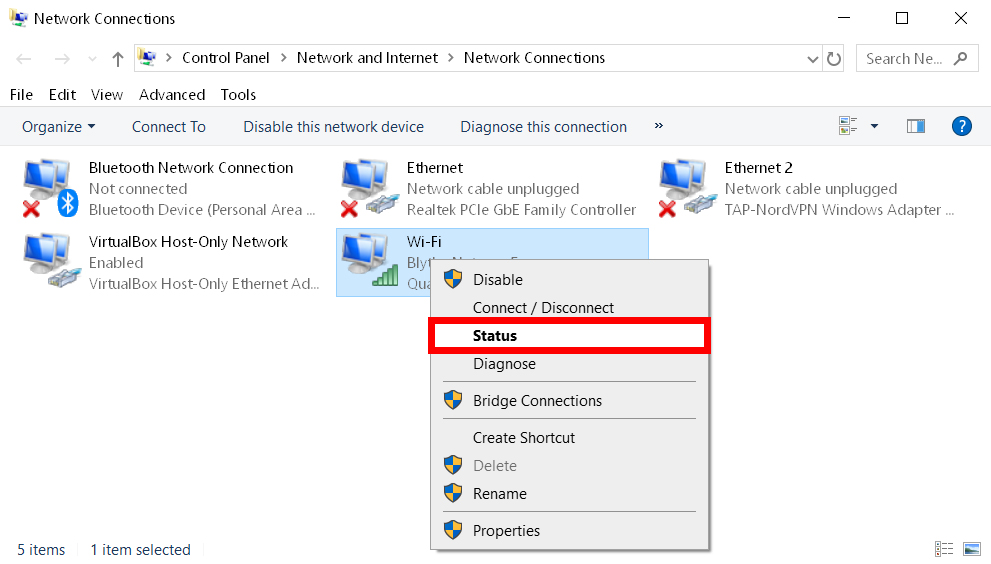
- Next, right-click WiFi Or Ethernet. It depends on what kind of connection you are using. If your computer is connected to your router via an Ethernet cable, right-click on that option. If your computer is connected via WiFi, right-click on that option. Looking at the red Xs and green bars you can tell which adapter you are using.
- Then select Condition.
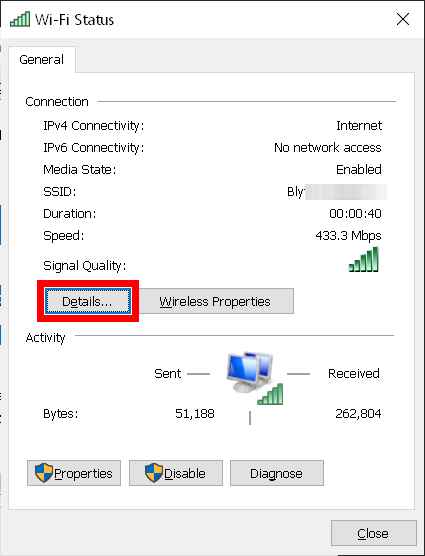
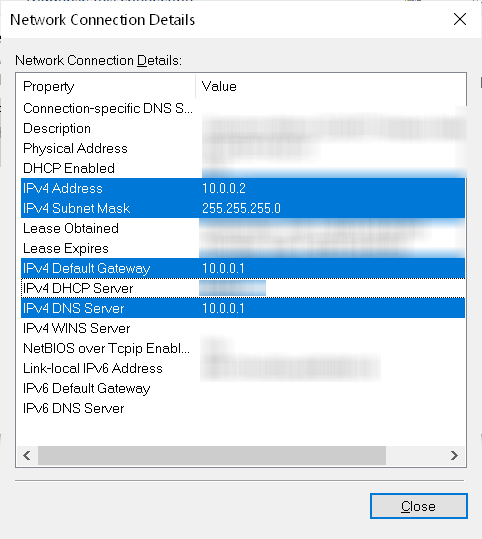
- Next, click details.
- Note your IPv4 address, IPv4 subnet mask, IPv4 default gateway and IPv4 DNS server.. It is better to write this information later.
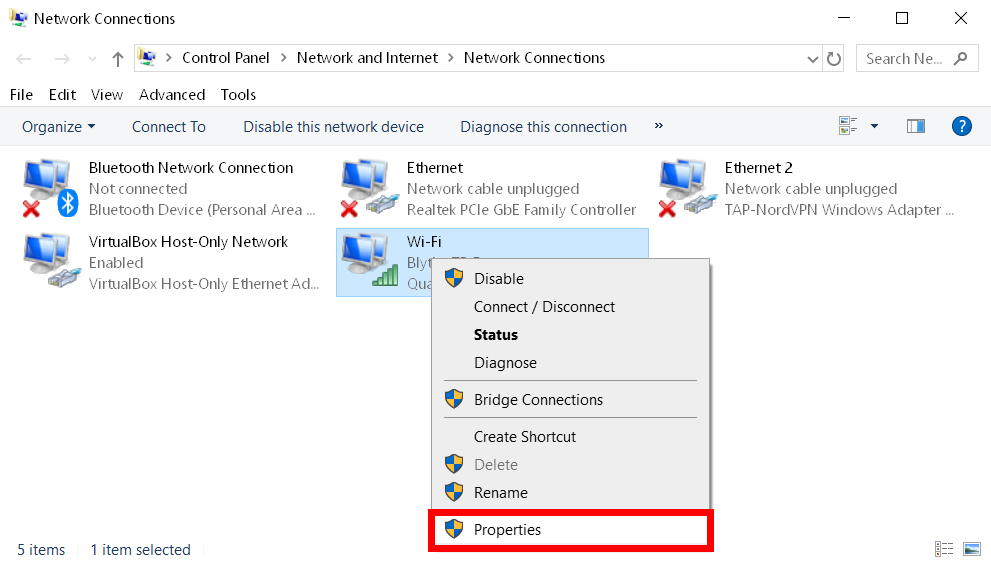
- Then go to the Network Connections window, right-click on your network and select Properties. You can do this by getting out of it Network connection details And Condition Windows by clicking the X in the upper right corner.
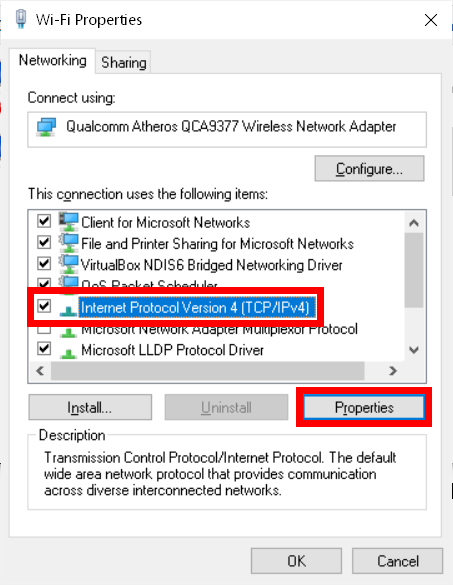
- Next, select Internet Protocol Version 4 (TCP / IPv4) And click Properties.
- Then click the radio button next to it Use the following IP address.
- Next, enter the standard IP address, subnet mask, default gateway and DNS server you want to use.
- IP address: Use the first 3 sections of your current IP address. So, if your computer’s IP address is currently 192.168.0.1, you can use any IP address starting with 192.168.0.X, where X is any number between 1 and 254. Or, if your computer’s IP address is 10.0.0.1, you can use an IP address starting with 10.0.0.X, where X is any number between 1 and 254. But make sure your computer’s IP address does not match your router’s IP address.
- Subnet: Generally, on a home network, the subnet mask is 255.255.255.0.
- Default gateway: This is the IP address of your router or any other gateway such as the access point
- DNS server: If you find numbers already filled in this box, you can use them. Otherwise, you can use the DNS server numbers you saw in the Network Connection Details window. Or you can use Google’s Favorite DNS Server 8.8.8.8 and 8.8.4.4.
- Finally, click OK Then close Properties Window. Your changes will not take effect until you close WiFi / Ethernet Properties Window.

Once you’ve set your Windows 10 PC to a standard IP address, check out our step-by-step guide How to port forwardSo you can access your computer remotely from anywhere in the world.
Last updated on January 21, 2022 at 2:44 pm
The Tech Chips editors choose the products and services we write about. When you make a purchase through our links, we may receive a commission.
Comments